WooCommerce is a popular e-commerce platform that allows businesses to sell products and services online. Tax management is critical to running an online store, which can be complex and confusing.
WooCommerce, on the other hand, makes it simple to set up tax rates for your products and services.
Customers can choose whether or not to display prices, including or excluding tax, using a tax toggle. This is practically useful if you sell the retail and b2b customers.
This tutorial will walk you through the step-by-step process of creating a tax toggle for your WooCommerce store.
With this guide, you can easily set up a tax toggle for your WooCommerce store and provide your customers with a hassle-free shopping experience.
Without any further ado, let’s jump into the tutorial.
On This Page
How to Create WooCommerce Tax Toggle?
To create a tax toggle in WooCommerce, I’ll use the WooCommerce Tax Exempt plugin. This plugin will allow you to create tax toggle and set up conditional tax exempts based on various conditions.
Follow the following steps to create a WooCommerce tax toggle to allow customers to see the prices with or without tax.
1. Install and Activate the WooCommerce Tax Exempt Plugin
Note: You can skip this step if you have already installed and activated the WooCommerce Tax Exempt Plugin.
To install the WooCommerce Tax Exempt Plugin, you must install the Woosuite Core plugin and activate your Woosuite license key. We have created a Quick Start Guide for you to figure out how to install and activate the WooCommerce Tax Exempt Plugin.
2. Enable Tax Rates and Calculations
Once the plugin is installed and activated, you need to enable the taxes.
To enable it, navigate to the WooCommerce » Settings from your WordPress admin dashboard and check the ‘Enable Tax Rates and Calculations’ checkbox to enable the tax rates.

Once you have enabled it, don’t forget to save the change by clicking the ‘Save Changes’ button in the bottom left corner of your screen.

3. Configure the Tax Options
After enabling the taxes, you need to configure the tax settings. To do so, click the Tax tab from the WooCommerce settings.

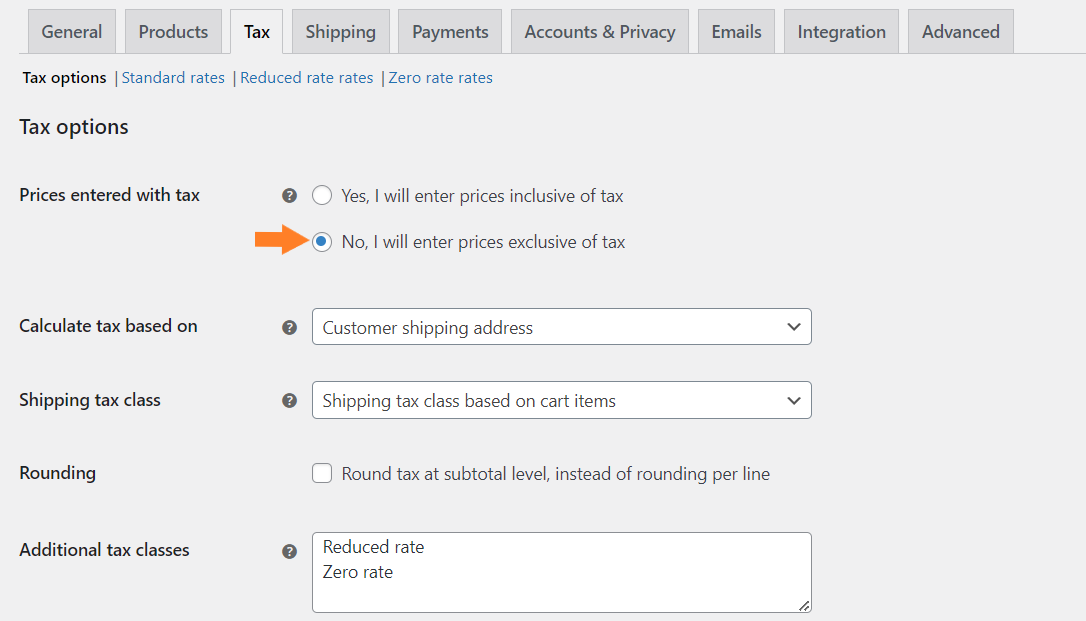
3.1. Enable Prices Exclusive of Tax
In WooCommerce, we can display the prices with or without the taxes, but we need to tell WooCommerce whether the price we entered includes the taxes or not.
From the ‘Prices Entered With Tax’ option, select the option you want. For this tutorial, I’ll choose ‘No, I will enter prices exclusive of tax.’
It means that while adding a product to my store, I’ll add the price exclusive of tax, and the tax will be added to the cart or checkout.
3.2. Price Display in Shop
Next, you need to select whether the customer will see the prices in the shop, including the tax, or not. For this tutorial, I’ll display the prices exclusive of the tax on the shop page.
It depends on your choice to display the prices, including or excluding the taxes.
Select ‘Excluded’ from the ‘Price display in the shop’ dropdown to do so.
Similarly, you can select the same for the ‘Display prices during cart and checkout.’

3.3. Save Changes
Once you are done configuring the tax settings, don’t forget to save the settings by clicking the blue ‘Save Changes’ button at the bottom left corner of your screen.

Note: I assume you already have created the tax rules in your WooCommerce store to charge tax. If not, please navigate to the Tax » Standard tax from the WooCommerce settings and add a tax rule.

Once the plugin is installed and activated, navigate to the Woosuite » Tax Exemption from your WordPress admin dashboard.

4.1. Click the Tax Display
Once you are in the plugin’s settings, click the ‘Tax Display’ tab to create a tax toggle.

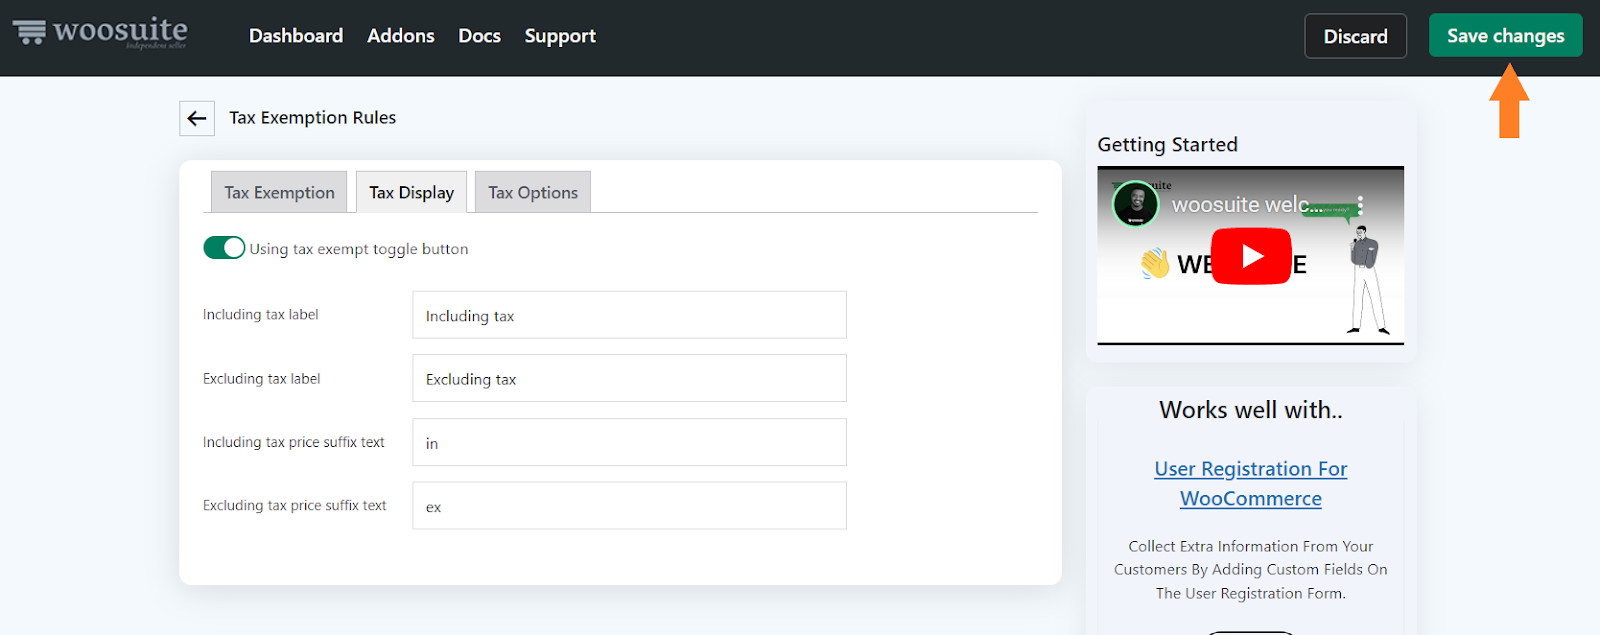
5. Enable the WooCommerce Tax Toggle
Now you just need to enable the toggle button by clicking the ‘Using tax-exempt toggle button.’ Once you enable it, you’ll see a few more fields.
These new fields will allow you to change the including tax label, excluding tax label, and their suffix. It completely depends on you what you want to set in this field.
For this tutorial, I am keeping them to the default labels and suffixes.

6. Save Changes
After that, click the green ‘Save Changes’ button at the top right corner of your screen to save the settings.
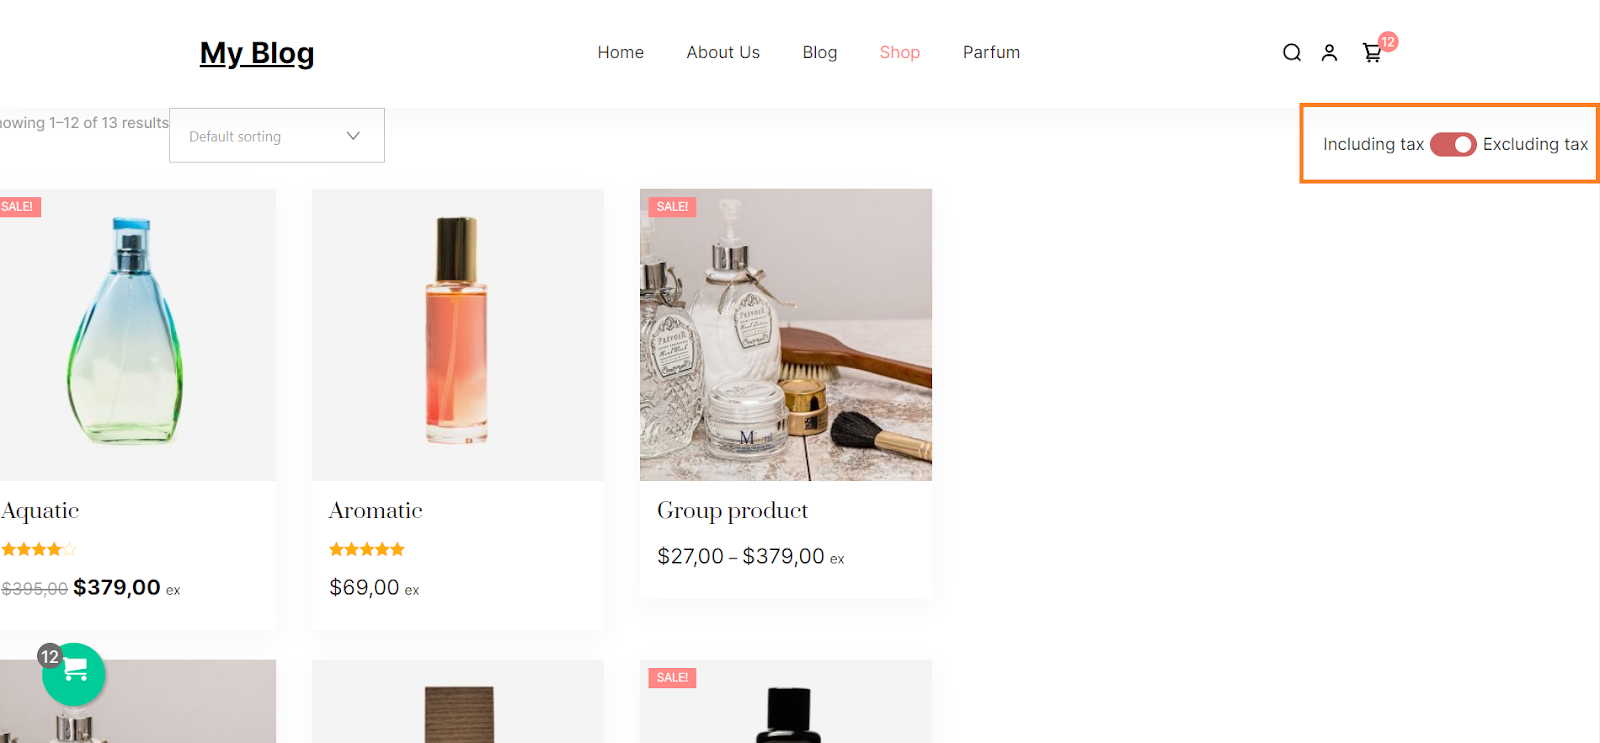
7. Final Results
Once the settings are saved, now is the time to test the toggle button.
Visit your shop page, and you’ll see that the tax toggle button has been added at the top right corner of your website. You can enable it to see the prices, excluding the tax.

How to Add WooCommerce Tax Toggle Button to a Specific Section of Your Site?
You can use our shortcode to display the tax toggle button to some other position on your site. The shortcode will display the WooCommerce tax toggle button.
Here’s the shortcode that you need to use.
[woos-tax-toggle]
It works with Elementor, Gutenberg, and other page builders. Follow the following steps to add a tax toggle button to your site using different page builders.
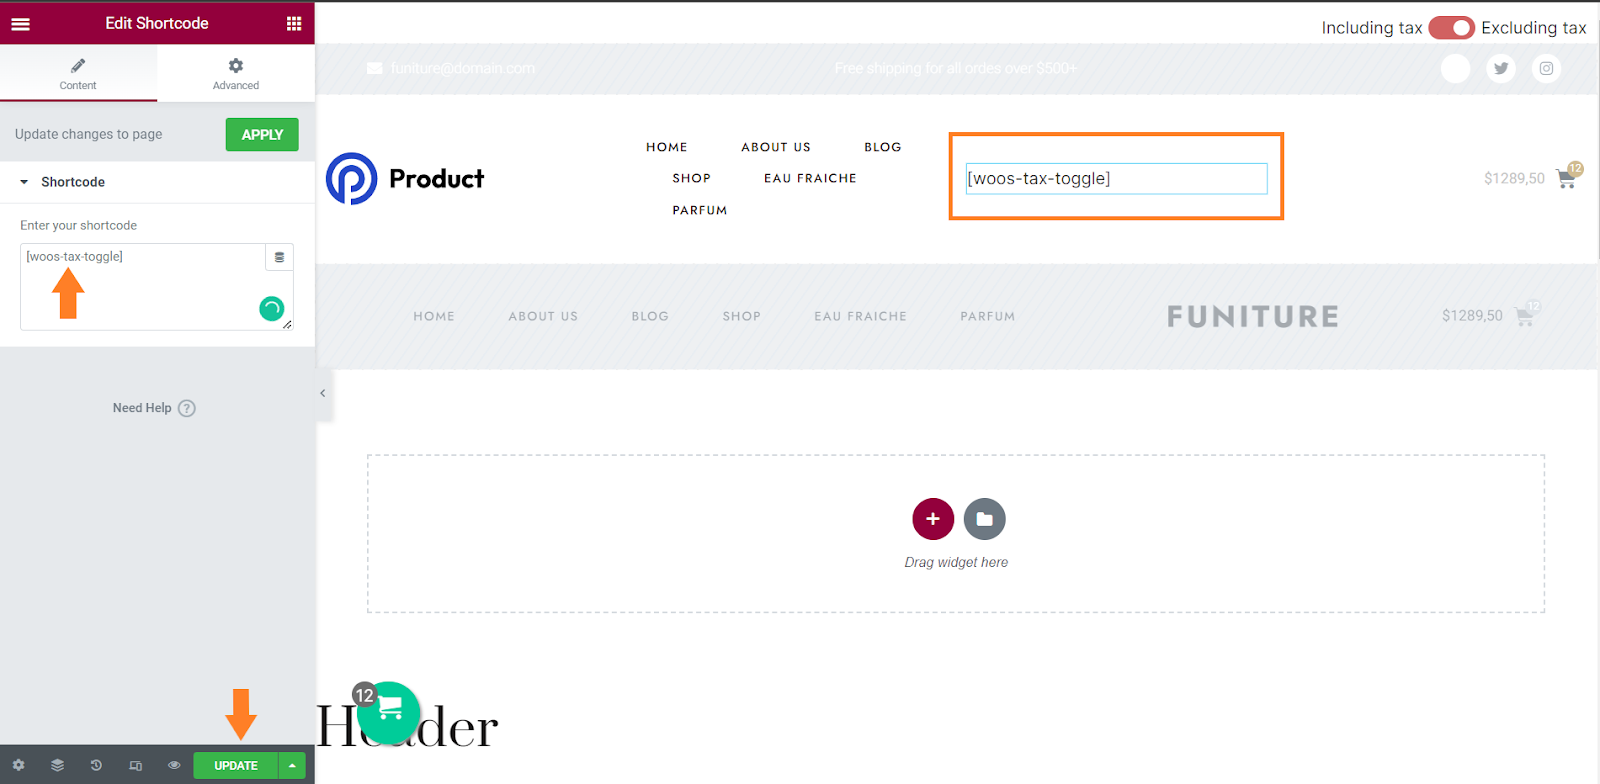
1. Add Tax Toggle Button Using Elementor
If you are using the Elementor page builder and want to add the tax toggle button to your store. You can easily add it by editing the section or the page.
Let’s say I want to add the toggle button to my store’s header. So, I’ll edit my store’s header section and add the ‘shortcode’ block where I want to display the toggle button.
Once the block is added, I’ll simply paste the shortcode and save the header.
1.1. Final Results
When I visited my store, I could see the tax toggle button in the store’s header instead of its default position.
Note: Once you add the shortcode anywhere on your site, the default position of the toggle button will be changed. You’ll not see two toggle buttons.

2. Add Tax Toggle Button Using Default WordPress Editor
Similarly, you can add the toggle button using the default WordPress editor. You can add it anywhere on your site.
For example: let’s say you want to add it to the shop page’s sidebar.
To do so, you need to customize the sidebar and add the shortcode block. Now you just need to paste the tax toggle button’s shortcode and click the Publish button to make it live.

2.1. Final Results
If you visit the shop page, you’ll notice the toggle button has been added to the shop page’s sidebar. You can enable or disable the tax prices using the toggle button.
Conclusion
That’s it for today’s article. I hope this article was helpful to you and you were able to add the tax toggle to your WooCommerce store.
In conclusion, adding a tax toggle feature to your WooCommerce store is a great way to improve the customer experience and increase sales.
With this feature, customers can easily choose whether they want to see prices including tax or excluding tax, which can be especially useful for businesses that sell products or services to customers in different states or countries with varying tax rates.
Moreover, the WooCommerce Tax Exempt plugin will help you ensure you do not lose any money while configuring the taxes. You can set conditions for tax-exempt rules to do so.
Ready to get started? Download the WooComemrce Tax Exempt plugin to work with taxes more effectively!
